Deploying a Full-Stack Next.js Application on AWS Amplify: A Beginner’s Guide
Step-by-step guide to deploying a full-stack Next.js application on AWS Amplify with CI/CD, GitHub integration, and troubleshooting tips.

Hi there 👋,
Welcome to the world of modern web development, where the complexities of building and deploying full-stack applications are made significantly simpler by powerful tools like AWS Amplify. This tutorial will walk you through the process of deploying a Next.js application utilizing AWS Amplify from beginning to end, regardless of your level of experience with web development or programming.
Next.js is a flexible React framework that provides developers with the best developer experience with all the features you need for production:
- Hybrid static (ISR),
- Server rendering (SSR),
- Static Site Generation (SSG),
- TypeScript support,
- Smart bundling,
- Route pre-fetching, and more.
It’s not just about the ease of development but also about ensuring your applications are optimized for performance.
AWS Amplify
AWS Amplify is a set of tools and services from Amazon that helps developers build and deploy full-stack applications efficiently. Amplify abstracts away much of the infrastructure management, making it easier to scale applications, manage backend services, and integrate with the AWS ecosystem. It’s directly integrated with a CI/CD pipeline that automatically deploys your site when you push your code changes.
Importance of AWS Amplify
- Managed Hosting with Continuous Deployment: AWS Amplify offers a managed hosting environment with built-in CI/CD capabilities that automatically deploy your application upon code commits and merges.
- Simplified Backend Integration: Amplify provides a straightforward way to connect applications to backend services like authentication, data storage, and APIs without extensive backend knowledge. This includes user authentication through Amazon Cognito, data storage via Amazon DynamoDB, and more.
- Local Testing and Emulation: Developers can run their applications locally to test functionalities before pushing changes live. Amplify’s local testing capabilities include functions, API, and storage, which closely mimic the cloud environment (Using CLI).
- Scalability: With AWS Amplify, your application can scale automatically with demand. It’s more cost-effective than Vercel’s scaling
Is it superior to Vercel?
AWS Amplify offers a more cost-effective solution for hosting web applications. AWS Amplify provides a pay-as-you-go pricing model with a 12-month free hosting option, making it a budget-friendly choice for users.
In contrast, Vercel has limitations in its free tier, such as bandwidth restrictions and potential markups on services, which could lead to higher costs as the project scales.
Additionally, AWS Amplify’s integration with AWS services like Amazon S3 and DynamoDB offers scalability without bandwidth restrictions, potentially reducing costs associated with data transfer and storage over time. While Vercel is known for its developer experience and simplicity, AWS Amplify’s cost efficiency and scalability make it a compelling option for users looking to manage expenses and avoid limitations as their projects grow.
Essential Prerequisites
Before we getting started, a few requirements must be fulfilled.
-
Node.js and NPM should be installed on your machine.
-
You should have a basic knowledge of GitHub.
-
Some familiarity with Next.js
-
Lastly, you must have an AWS account.
#1: Create a Next.js Application
To create a new Next.js application, Run this command:
Once you created the application, navigate to the project directory and Open your project with a code editor (VS code).
Now you have a basic Next.js application. You can create more files for your application and implement the server actions and API routes within your application. Then it becomes a full-stack application with the database connection.
#2: Push the Code to GitHub
When you’re done building your Next.js application, You have to push your code to GitHub.
Create a new repository on GitHub and push the code according to the instructions provided:
#3: Deploy the Application on Amplify
You must have a AWS account for the deployment. If you have, login your account through https://aws.amazon.com/.
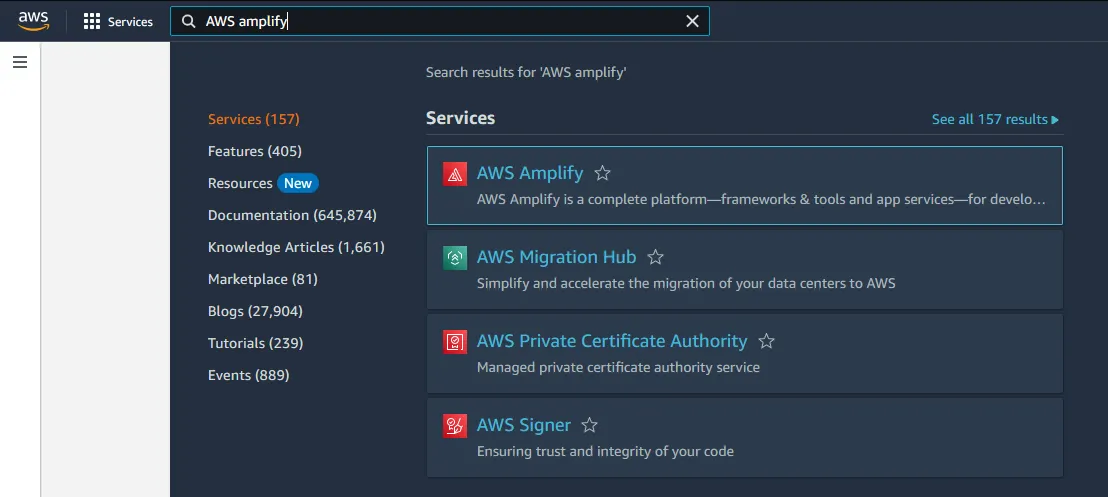
In the AWS dashboard, you can search the “AWS Amplify” by using the search bar present at the top, then navigate to AWS Amplify.
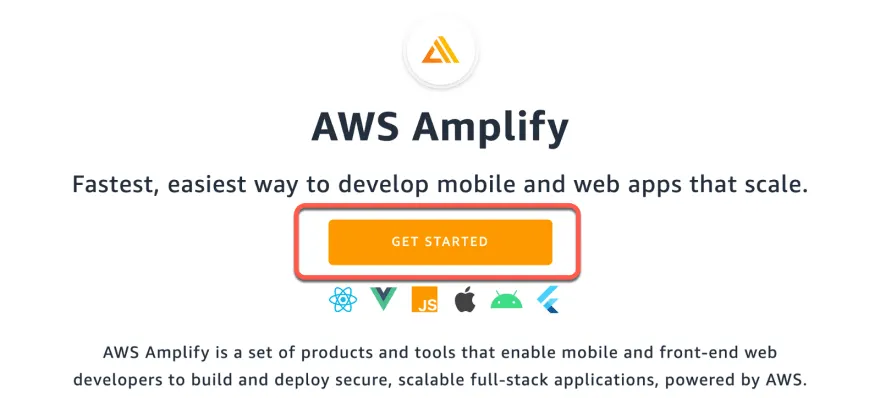
If you’re new to AWS Amplify or you haven’t deployed any app yet, you will see this page. Click the “GET STARTED” button to start the deployment process.
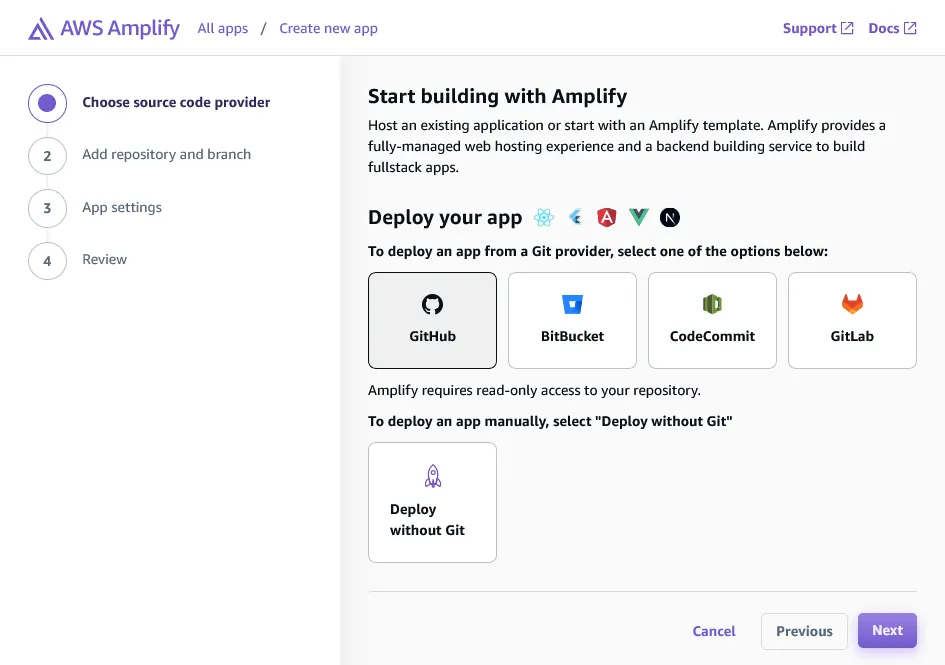
Click “Next” to connect your GitHub account, Allow all permissions to authorize AWS Amplify Console for your GitHub.
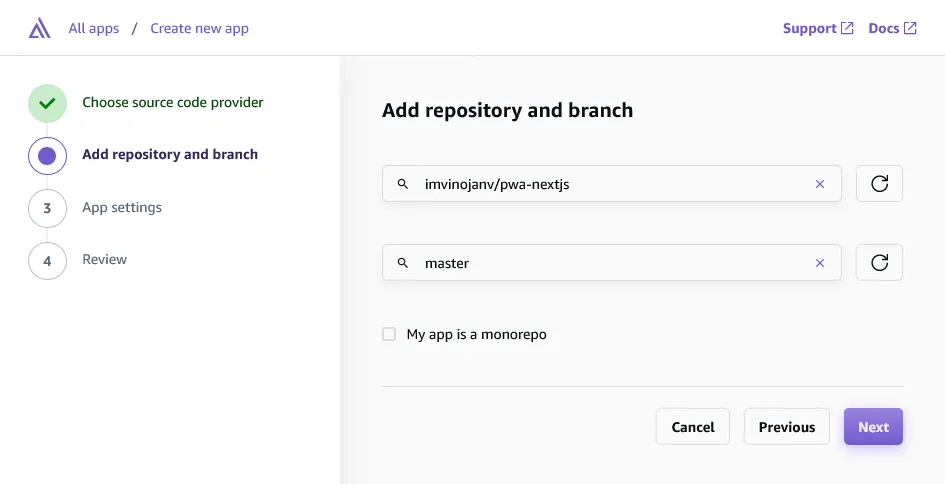
If you have granted all permissions to AWS, you can now select your repository and branch from the dropdown. Then click “Next” to the next step.
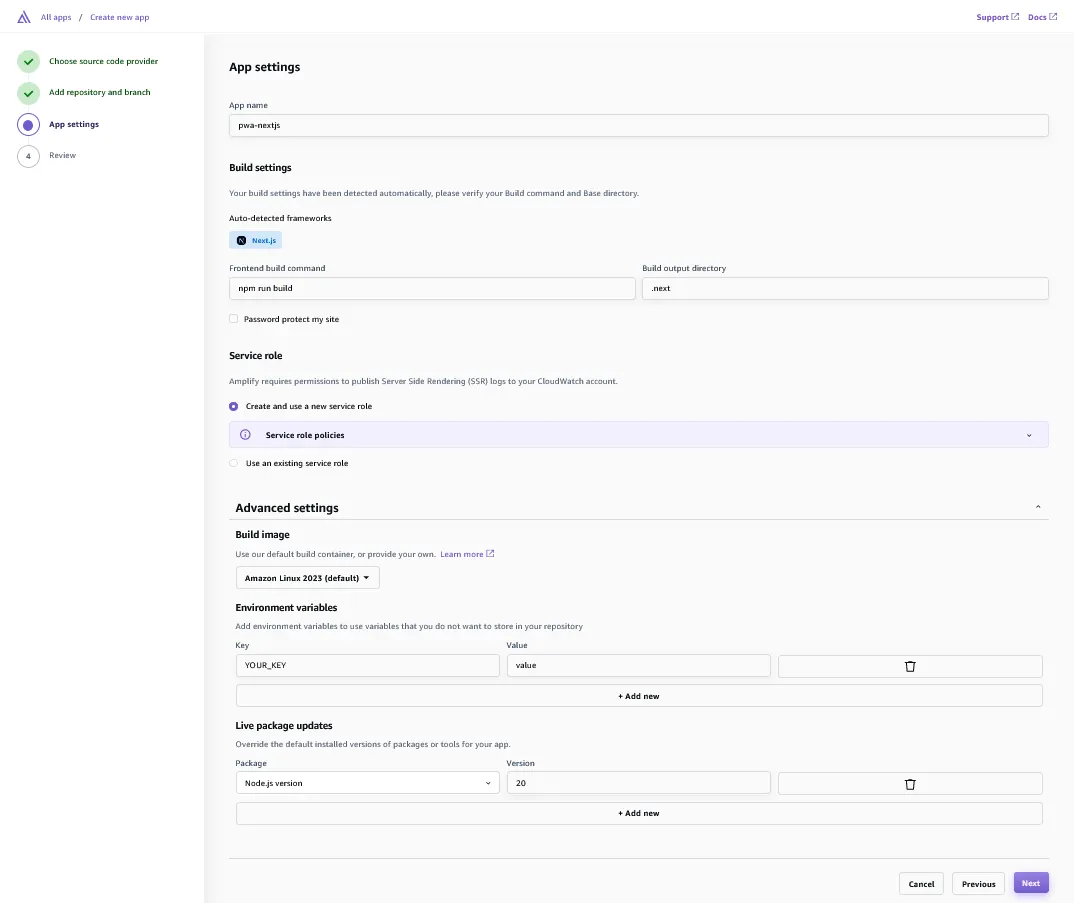
Following that, you’ll be taken to the “Build settings” page, where you’ll see the name of your app as well as its auto-detected front-end and back-end frameworks.
You may create a new ‘Environment variables’ on the Advanced settings section. And then, if you don’t see an existing service role, you’ll need to create one on the Service role section.
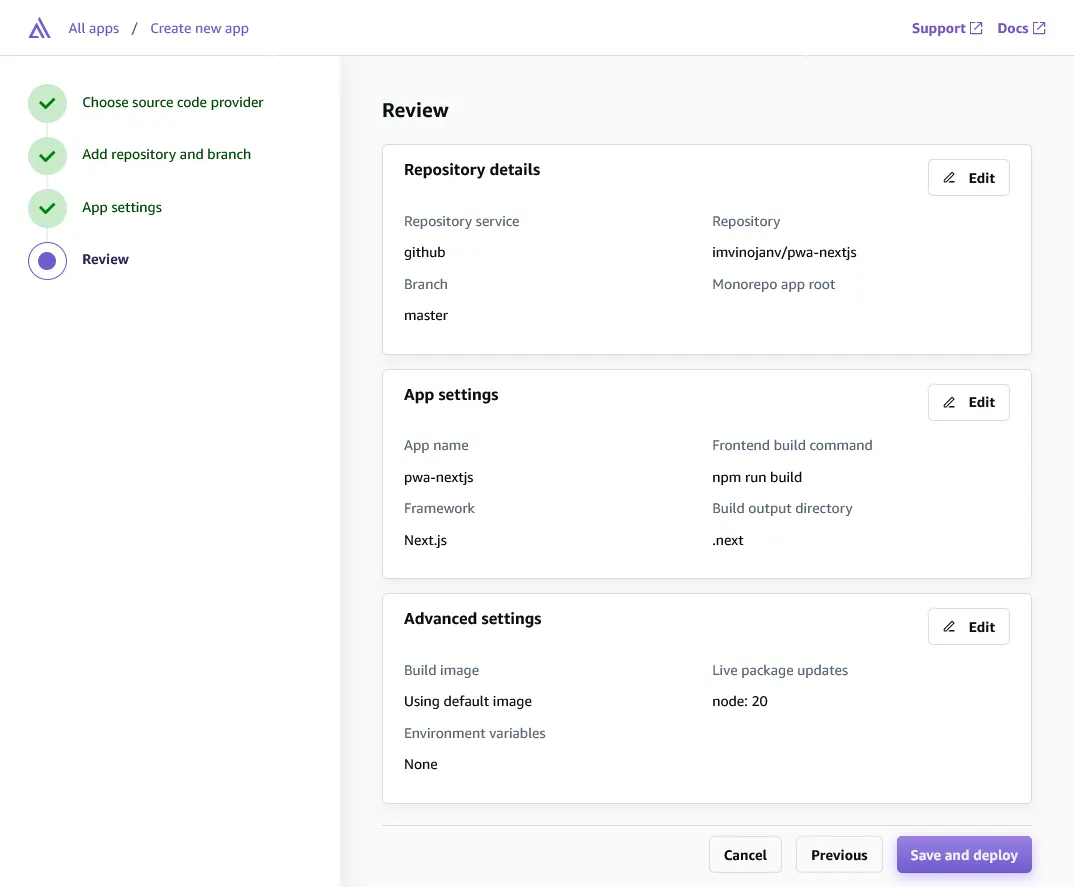
On this page, you can review your app before it is deployed. You can edit as well. If everything is in order, press the “Save and deploy” button.
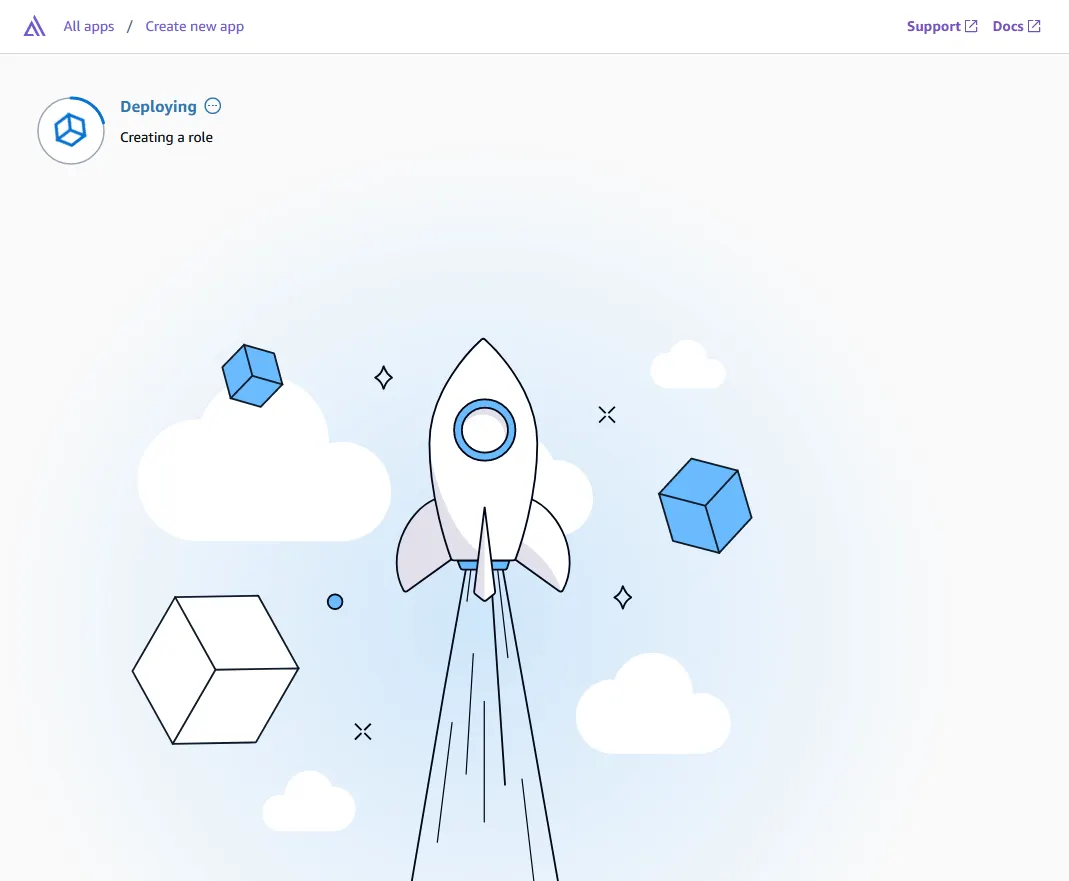
And that’s it! It will take some time for the system to be deployed🎊. Then after it’s done, click on the link provided to see your Next.js app in action.
Discussing Potential Deployment Issues and Solutions
When deploying a Next.js application on AWS Amplify, several common issues might arise. Understanding these issues and knowing how to address them can help ensure a smooth deployment process. Below, I outline some typical challenges and provide step-by-step solutions:
1. Dependency Issues
During the build process, it’s possible that some of your dev dependencies are not being installed, which can lead to build failures. AWS Amplify, by default, installs only production dependencies during the build phase.
Solution:
If certain dev dependencies are crucial for the build process, you can move them to the normal dependencies in your package.json. Alternatively, you can modify the amplify.yml file to ensure dev dependencies are installed:
After updating, push the code changes to your repository and redeploy the application.
2. TypeScript Installation Issues
Sometimes, TypeScript might not be installed properly, which can prevent your application from compiling correctly.
Solution:
Ensure TypeScript is installed and used correctly by modifying the build commands in amplify.yml:
This setup ensures TypeScript is installed globally and the project is built using TypeScript before the Next.js build process.
3. Issues with Path Aliases
Path aliases like @/components or @/utils might not be recognized during the build process due to TypeScript or build configuration issues.
Solution:
Ensure your tsconfig.json includes the correct paths configuration:
Push the updated tsconfig.json to your repository and redeploy to ensure the path aliases are correctly recognized.
4. Prisma ORM Errors
If you’re using Prisma as your ORM, the Prisma client might need specific binaries to run on AWS Amplify’s build environment.
Solution:
Update your schema.prisma file to include the necessary binaryTargets for compatibility:
This change ensures that Prisma generates a client that is compatible with the AWS environment, addressing potential runtime issues.
5. Environment Variable Issues
There might be issues with environment variables not being recognized during runtime, even if they are set up in the AWS Amplify console.
Just assuming the environment variables are
DATABASE_URL,NODE_ENV,JWT_SECRET.
Solution 1:
To set the environment variables to the production stage, Modify the next.config.mjs file with this code:
Solution 2:
To debug environment variables during the build, add echo commands in the amplify.yml to print out environment variables:
This will help you verify if the environment variables are correctly set during the build process. Ensure that all sensitive information is kept secure and not exposed in logs.
By addressing these issues with the provided solutions, you can mitigate common deployment challenges when using AWS Amplify to deploy a Next.js application.
Conclusion
Deploying a Next.js full-stack application using AWS Amplify simplifies the development and deployment processes, enabling efficient management and scalability of applications. This guide covered everything from setting up AWS Amplify and its benefits, creating a Next.js application, to troubleshooting common deployment issues. With AWS Amplify’s robust features like backend integration, CI/CD pipelines, and seamless AWS service integrations, developers can enhance productivity and focus more on building than on infrastructure management.
Understanding and resolving deployment challenges is crucial in leveraging AWS Amplify to its fullest potential. As you continue to explore and experiment with AWS Amplify’s advanced features, you’ll be well-equipped to develop high-performing web applications. The AWS community and extensive online documentation are invaluable resources as you expand your skills and embark on more complex projects. Keep building and refining your applications, and remember that each challenge is an opportunity for growth and learning in your development journey.
I appreciate you taking the time to read this article.🙌
Before you move on to explore the next article, don’t forget to give your claps 👏 for this article and share with your friends. Stay connected with me on social media. Thanks for your support and have a great rest of your day! 🎊
✍️ Vinojan Veerapathirathasan.