Mastering File Uploads in Next.js: Integrating AWS S3 and Neon.
A Comprehensive Guide to Building Scalable File Upload Features in Your Next.js Applications Using AWS S3 and Neon.
Hi there 👋,
Welcome back to another enlightening journey into the modern web development landscape. Today, we’re diving deep into the realm of file uploading in Next.js applications — AWS S3 with Neon. 🚀
📑 In this tutorial, we’ll explore how to seamlessly integrate file uploads into your Next.js projects using AWS S3 for storage and Neon for database interactions. Are you ready to enhance your application’s capabilities and elevate your user experience? Let’s jump right in! 🎉
🌐 AWS S3 (Amazon Simple Storage Service) is a robust, scalable object storage service offered by Amazon Web Services. It’s designed to store and retrieve any amount of data from anywhere on the web, making it a popular choice for storing images, media, or any form of data that an application needs to operate.
This setup provides the perfect platform to build upon, whether you’re developing a small project or a large-scale production application. With the straightforward setup of AWS S3 and the robustness of Neon, you’re equipped to handle file uploads and management with ease, promoting best practices and efficient data handling in your Next.js applications. Let’s delve into the details and get our hands on the code!
Prerequisites
- Basic understanding of React and Next.js
- Node.js installed
- An AWS account
- A Neon account
#1: Set Up Your Next.js Project
We begin by creating a new Next.js project configured with TypeScript and Tailwind CSS for styling.
When prompted, choose:
- Yes: when prompted to use TypeScript.
- No: when prompted to use ESLint.
- Yes: when prompted to use Tailwind CSS.
- No: when prompted to use
src/the directory. - Yes: when prompted to use App Router.
- No: when prompted to customize the default import alias (
@/*).
#2: Configure AWS S3 Bucket
Go to the AWS console and log in to your account. Search “S3” in the search bar and navigate to the Amazon S3 dashboard, then create a new bucket with all default settings.
Copy the bucket name to be used as NEXT_AWS_S3_BUCKET_NAME in your application.
Setting up AWS S3 involves creating a bucket and adjusting its permissions to allow public access to uploaded files.
S3 Bucket Policy:
CORS for S3 Bucket:
This policy allows public read access to objects within the specified bucket. It’s crucial to ensure that uploaded files are accessible via direct URLs.
Then, Disable the “Block public access” option by clicking the checkbox.
Finally, complete the bucket creation process by clicking the Create bucket at the end.
Create access keys for IAM users (in AWS):
Create a new IAM user for this S3 bucket by allowing access to that with the User group of ‘AmazonS3FullAccess’. Then create the access key, now you can get the Access key (NEXT_AWS_S3_ACCESS_KEY_ID) and the Secret access key (NEXT_AWS_S3_SECRET_ACCESS_KEY). Copy them!
#3: Set Up Neon Database
Create a new database in Neon to store file URLs after upload.
Neon provides a scalable and serverless PostgreSQL that integrates easily with serverless functions.
Create a new table:
Get the database string from the Neon console.
The connection string looks like:
_postgres://[user]:[password]@[neon_hostname]/[dbname]_and can be found in the Connection Details widget on the Neon Dashboard.
#4: Environment Configuration
Securely store configuration values in the .env file to keep sensitive information out of your codebase.
.env Configuration:
#5: Install Dependencies
Install the required packages for integrating AWS S3, handling file uploads, and interacting with the Neon database.
The command installed the following libraries:
@aws-sdk/client-s3: AWS SDK for JavaScript S3 Client for Node.js, Browser, and React Native.@aws-sdk/s3-request-presigner: SDK to generate signed URL for S3.@neondatabase/serverless: Neon's PostgreSQL driver for JavaScript and TypeScript.react-dropzone: Drag to upload file library for React.
#6: Implement S3 Client
Set up an S3 client to interact with your AWS S3 bucket.
This initializes an S3 client configured with credentials and region from your environment variables, which will be used to upload files to S3.
#7: Create API Routes
Now, let’s move on to creating an API route to obtain a pre-signed URL to upload objects to.
Create a presigned URL with S3 SDK
Presigned URLs allow you to upload large chunks of data directly at the source (here, Amazon S3).
This saves you from a couple of limitations of a server-based upload operation:
- maximum request payload restrictions (on a hosting service, especially in serverless)
- huge RAM required to process multiple large file buffers at the same time
The code above creates an S3 client using the
@aws-sdk/client-s3SDK. Then, it uses thegetSignedUrlutility (from@aws-sdk/s3-request-presigner) to sign the URL. ThisGEThandler that validates the presence of all the environment variables required and the file name and it's content type.
Now, let’s move on to building an endpoint to insert the reference to the uploaded object in Postgres.
The code above defines a POST endpoint, which first validates the presence of DATABASE_URL environment variable.
Now, let’s learn how to call these APIs in the front-end built with React.
#8: Create File Upload Component
Build a React component using react-dropzone for the UI to handle file uploads.
Here,
useDropzonehook handles the drag-and-drop functionality. On file drop, its perform a GET call to/api/presignedAPI route with the file name and type as the query params. Obtain the presigned URL, and then upload the file as a Blob to it. Then perform a POST to the/api/user/imageroute, with the presigned URL configured to not contain the query parameters. The stripped URL is an absolute reference to the publicly available object uploaded.
Import the component in the page.tsx file.
#10: Run the Application
To run and check the application, execute the following command on your code terminal:
This command starts your Next.js development server, making your application accessible locally via http://localhost:3000.
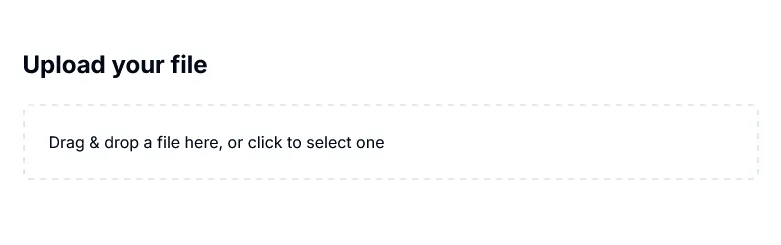
Use the file upload interface provided by the FileUploader component to select a file or drag and drop a file into the designated area.
Upon successful upload, you should see a link to the uploaded file, indicating that it is now stored in AWS S3 and its URL is recorded in your Neon database. 🎉
Verify in AWS S3 and Neon.
🍃 Congratulations! You’ve successfully integrated file-uploading capabilities into your Next.js application using AWS S3 and Neon. This setup not only enhances your application’s functionality but also leverages the scalability and security of AWS and the efficiency of serverless databases. By following this guide, you’ve equipped yourself with valuable skills that can be applied to various web development projects, making your applications more robust and user-friendly.
Remember, the world of web development is always evolving, and there’s always something new to learn. Happy coding! 🚀
I appreciate you taking the time to read this article.🙌
Before you move on to explore the next article, don’t forget to give your claps 👏 for this article and share with your friends. Stay connected with me on social media. Thanks for your support and have a great rest of your day! 🎊
✍️ Vinojan Veerapathirathasan.